Initial Set-Up and
Calibration
for the MSA
Updated
Nov. 9, 2017,
Re-release the folder, MSA_Software.zip. It had a missing file.
Updated
Aug. 11, 2017,
Update for MSA Software Version 118 Rev 0. Note: Cypress USB must be
re-programmed.
Updated
June 9, 2016, Update
Frequency and Path Calibration
Updated Mar. 3, 2014,
Notice for Win7 and later for Liberty Basic Users
Special Notice for XP and
later
users, Possible XP
Problems (at end of this page)
This page will
describe the Initial Set-Up for a new MSA and the procedures to
Calibrate it. The MSA Software can be
downloaded from this page. The procedures apply to
both the Original MSA and the SLIM MSA. Separate pages will
describe the Operation of the
MSA for its different Functions. Before you
begin this Initial Set-Up and Calibration, I suggest you read
and become familiar with MSA Control and
Operation.
I.
Initial Set-Up Procedure for the MSA
Before
the MSA is can become operational, these procedures must be followed:
A.
MSA Software Download and Installation
Initial Software Installation
MSA
Software Updates
Reverting
to Original Software
B. Hardware Configuration
MSA Hardware Configuration
MSA Hardware Adjustments
Computer Interface Configuration
For USB Operation
For LPT Operation
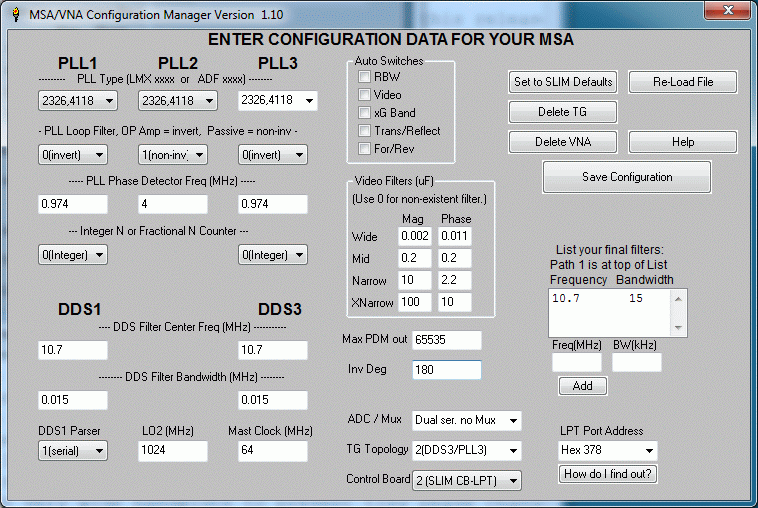
C. MSA Program Configuration
Run the MSA Program
Configuration
Manager Window
Files created by the Software
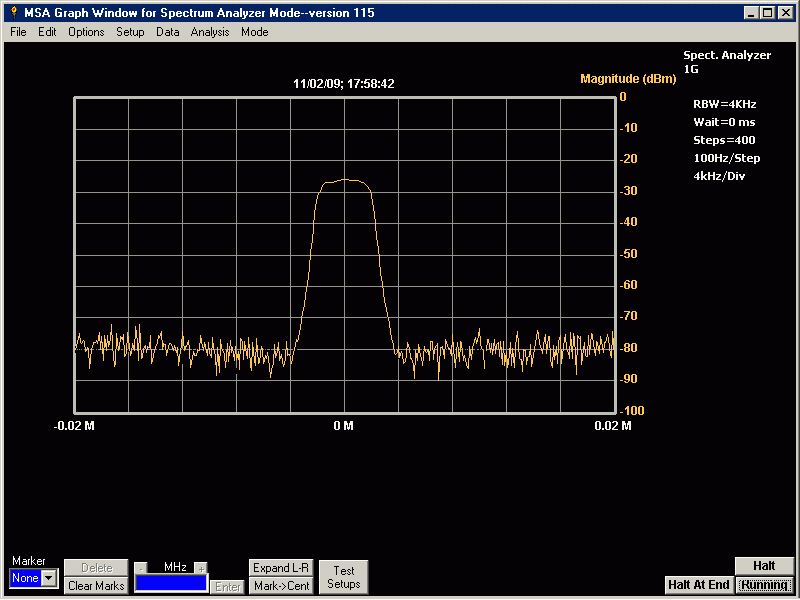
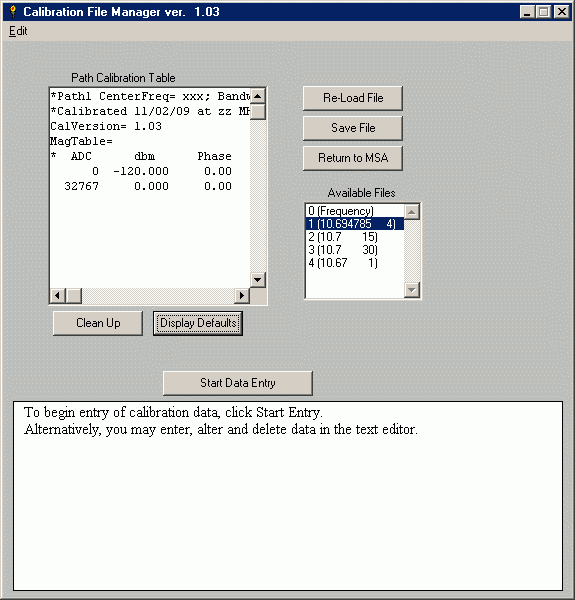
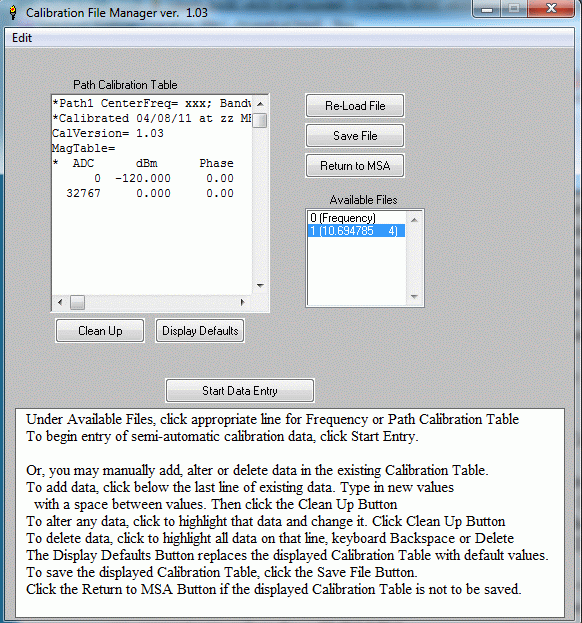
D. Coarse Calibration using
the Calibration File Manager
II.
Calibration Procedures for the
MSA
For the MSA to
be accurate, calibrations must be performed, in this
order:
A.
Coaxial
Cavity Filter, Tuning
Procedure
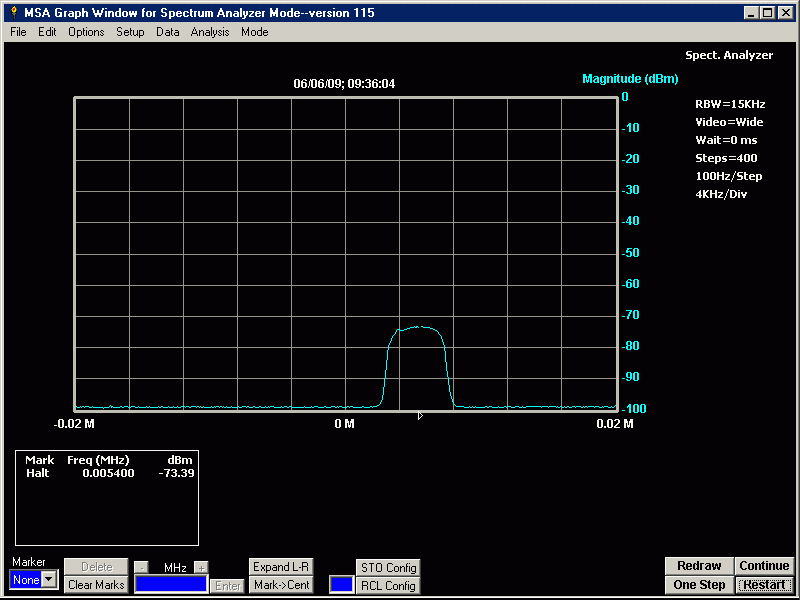
B.
Master Oscillator Calibration
C.
Resolving Filters in the MSA
Resolving the Final Crystal
Filters for each Path
Resolving the DDS Crystal Filters
(in-work)
D. Phase
Detector Module Calibration (VNA only)
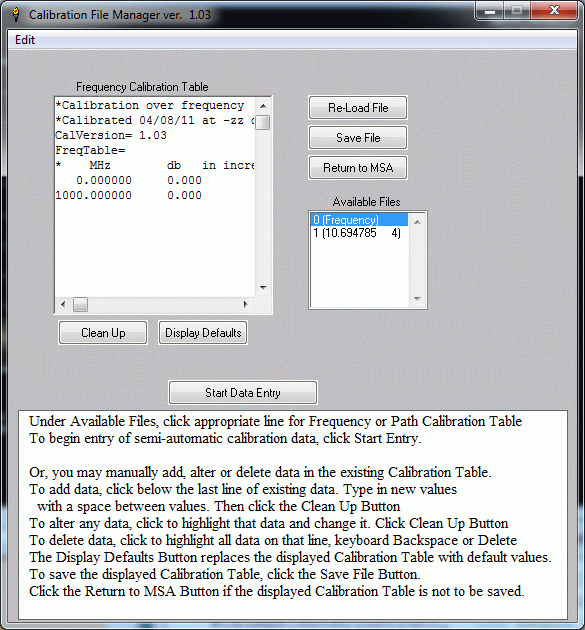
E. Path
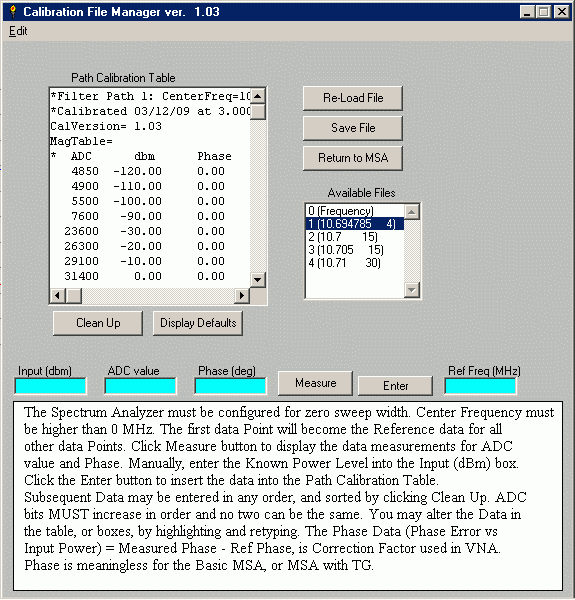
Calibration for Magnitude (and Phase for VNA)
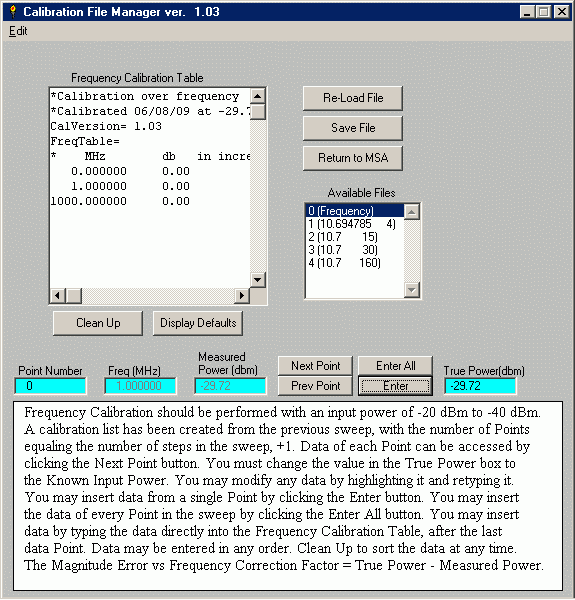
F. Frequency Calibration for
Magnitude
F1.
Manual
Frequency Calibration for
the Basic MSA, or
F2.
Semi-Automatic
Frequency
Calibration for the
MSA/TG